Selecting and Attaching MOLLE Gear
Choosing the right gear
Selecting the right gear is pretty simple, but there are a few things to keep in mind to ensure proper compatibility with your FenderLinks:
size
The most obvious factor is size. When it comes to MOLLE gear, it helps to think in terms of the available “real estate” on the mount. Within the MOLLE system, real estate is defined in terms of ROWS and COLUMNS. When buying your gear, always get a close look at strap arrangement on the back of the MOLLE accessory. If you only have 3 columns available on your mount (e.g., like the left FenderLink on a Yamaha Grizzly), then you typically want to avoid larger gear with the VERTICAL straps spaced for 4 (or more) columns of real estate. You must also consider the number of available rows, but you can cheat in this area to some extent by hanging a bag or pouch partially below the bottom of the FenderLink.
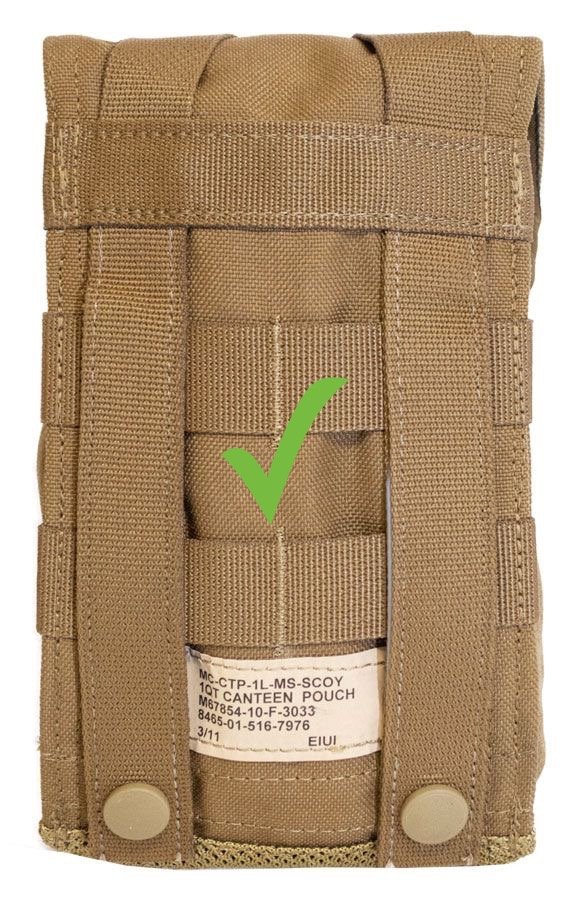
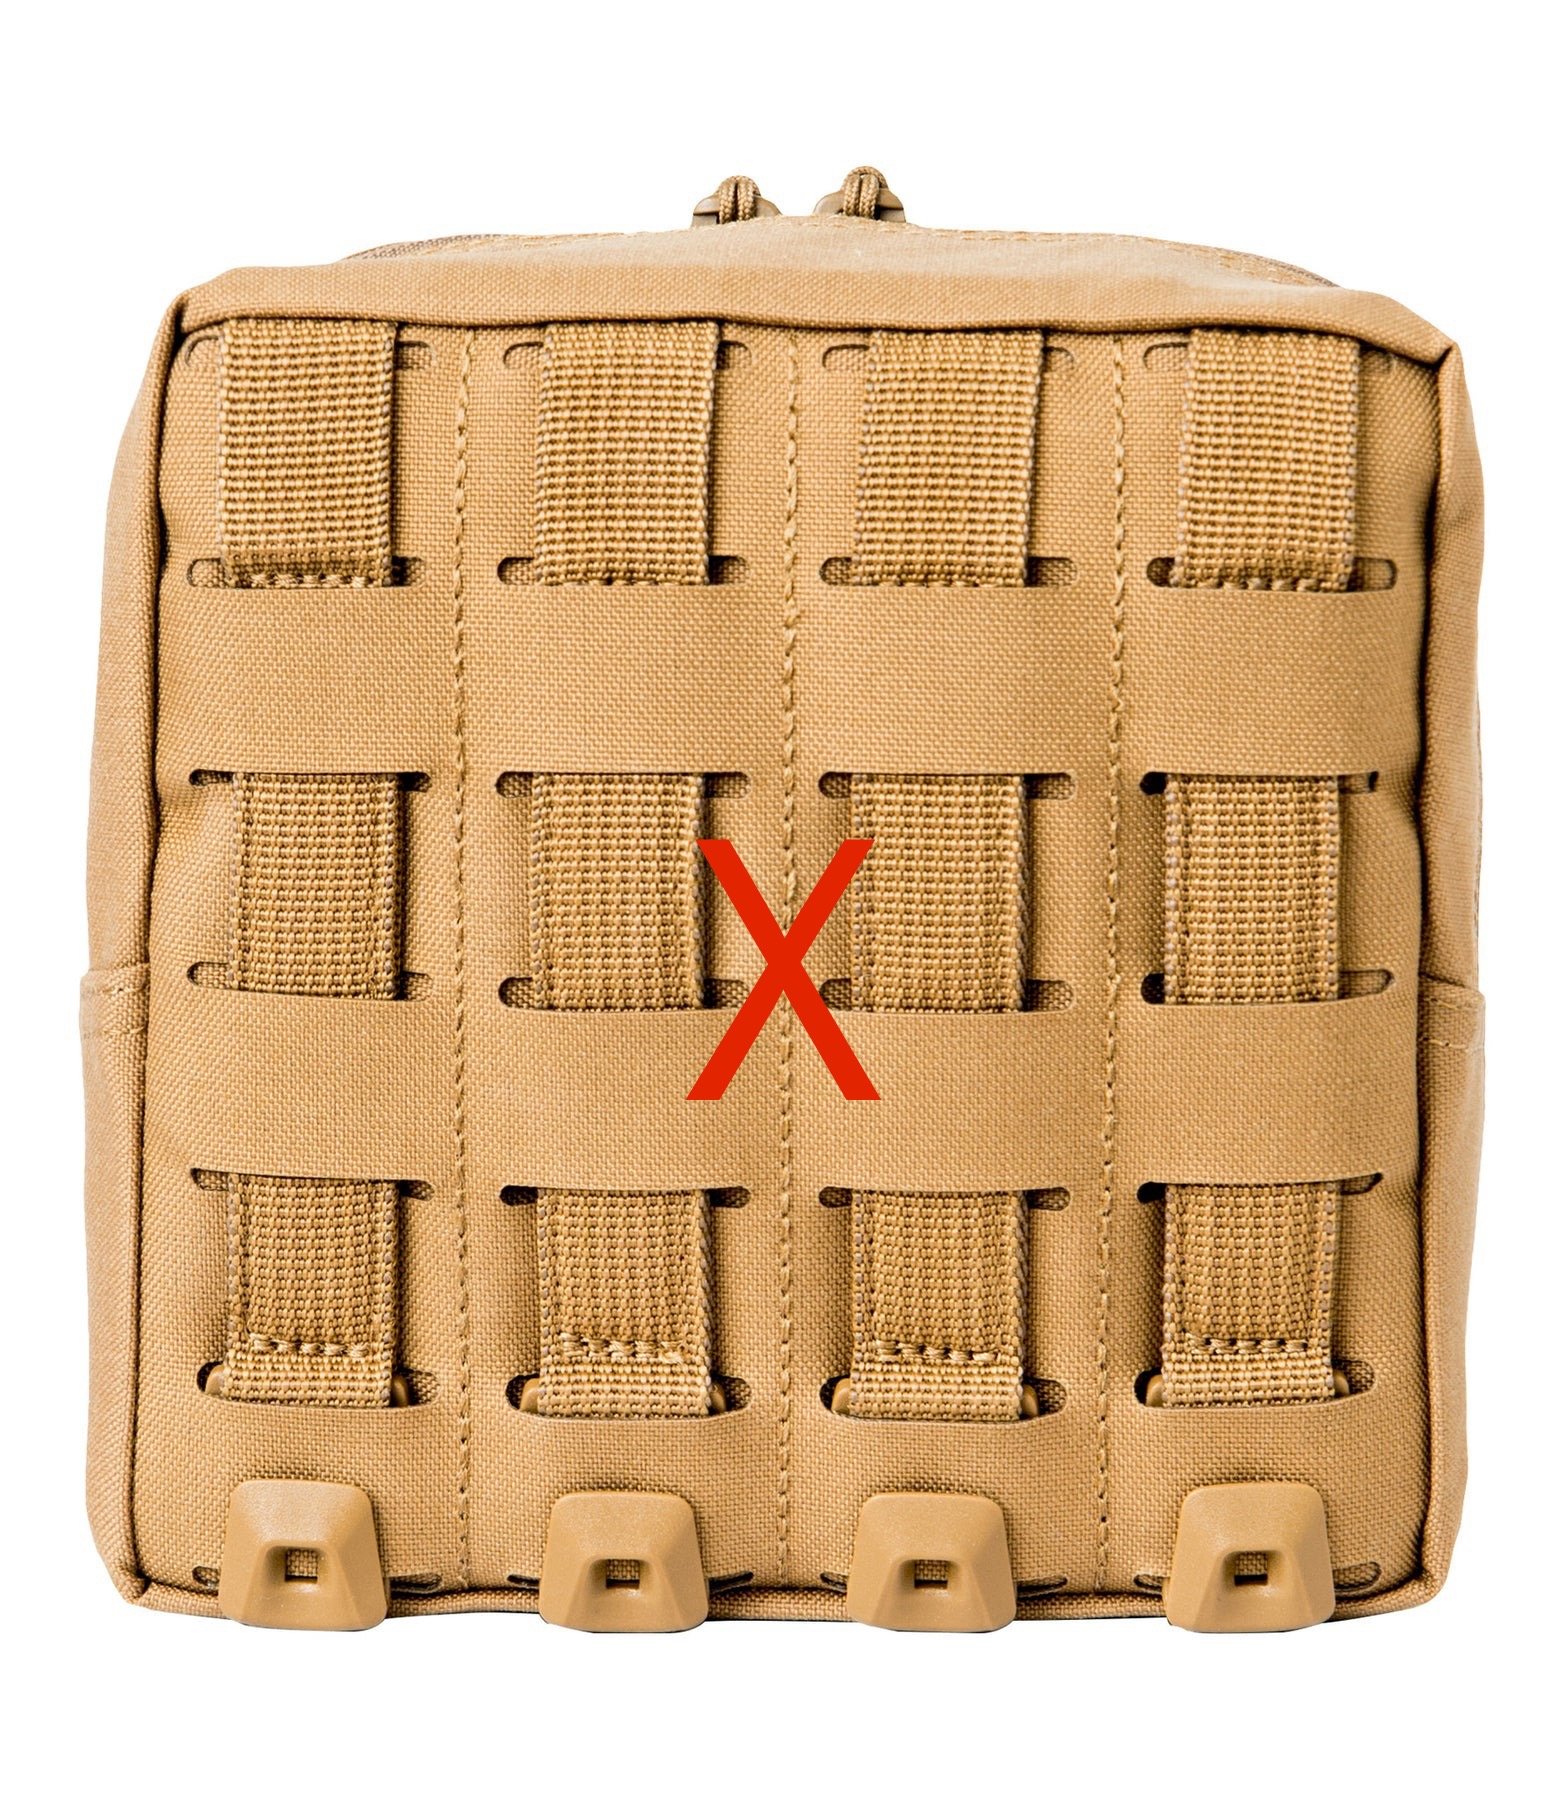
In the pictures below, note that the FenderLink has 3 columns, while some MOLLE accessories require additional columns for compatibility:
Strap Type
MOLLE-based gear has been around since the late 1990s. While the basic attachment methods have been largely unchanged, there have been some innovations in strap design. Before you look at the images below, take another look at the two pouches in the images above. In both examples, the pouches have vertical nylon straps with round snaps on the ends. These are, by far, the most common strap type. They are also the best strap type for FenderLinks.
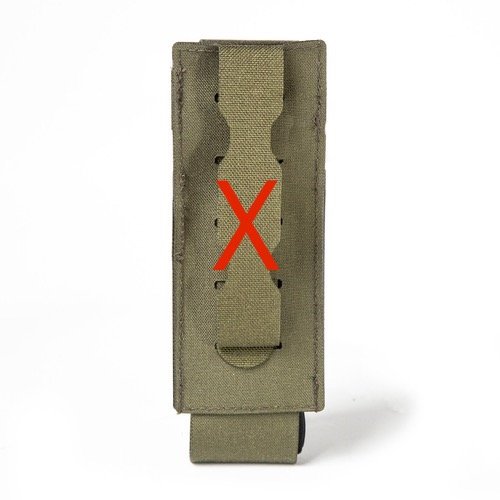
In the three images below, you can see alternative strap designs. These work fine when attaching gear to fabric-based MOLLE grids that are sewn into backpacks, vests, and other apparel. They will NOT work for rigid MOLLE mounts, such as FenderLinks.
True MOLLE Spec Gear
With the popularity of MOLLE gear, hundreds of manufactures have jumped on the bandwagon to capitalize on the market. This is both GOOD and BAD. It’s great because there are SO many options out there, but it’s also bad because the MOLLE standard has been watered down by civilian gear that doesn't actually follow the official dimensional specs for the grid layout. This means you might end up with gear that ALMOST works, but just doesn’t quite fit right. Or worse, it doesn’t fit at all. This is more often a problem with lower-quality, imported gear, but even some of the higher-quality gear can vary enough to be problematic.
Notice the two pouches in the images below. The first is US military spec (i.e., built to true MOLLE grid specifications) and the second is not. The otherwise high-quality, waterproof black pouch has MOLLE straps that are spaced somewhere in between a 3- and 4-column application. Take a look at the white arrow in the third picture and notice that the vertical straps are spaced too narrowly. In this case, an installation could be forced, but it creates undue strain on the straps and stitching. In other words, it’s not an ideal option for FenderLinks.
The best strategy here is to take a close look at the strap design of the MOLLE gear and then buy from sources where returns are not too difficult. If the MOLLE gear doesn't work out, send it back and try something different.
Attaching Your gear
Attaching MOLLE pouches and bags to your FenderLinks is fairly straightforward, but there are a couple of mistakes you’ll want to avoid that are not immediately obvious.
Proper Strap Weaving
As mentioned previously, MOLLE-based systems originally consisted of nylon straps sewn in a grid pattern onto the fabric of gear such as military packs and vests. When MOLLE gear is attached to a soft, non-rigid, cloth-based grid, the straps of the MOLLE accessory can easily be woven in and out of each row in the grid and secured with the snap. Rigid MOLLE panels, whether manufactured from plastic, aluminum, or steel, are typically not designed for this attachment method. Instead of weaving the straps in and out of EVERY row in the panel, you MUST skip rows as necessary.
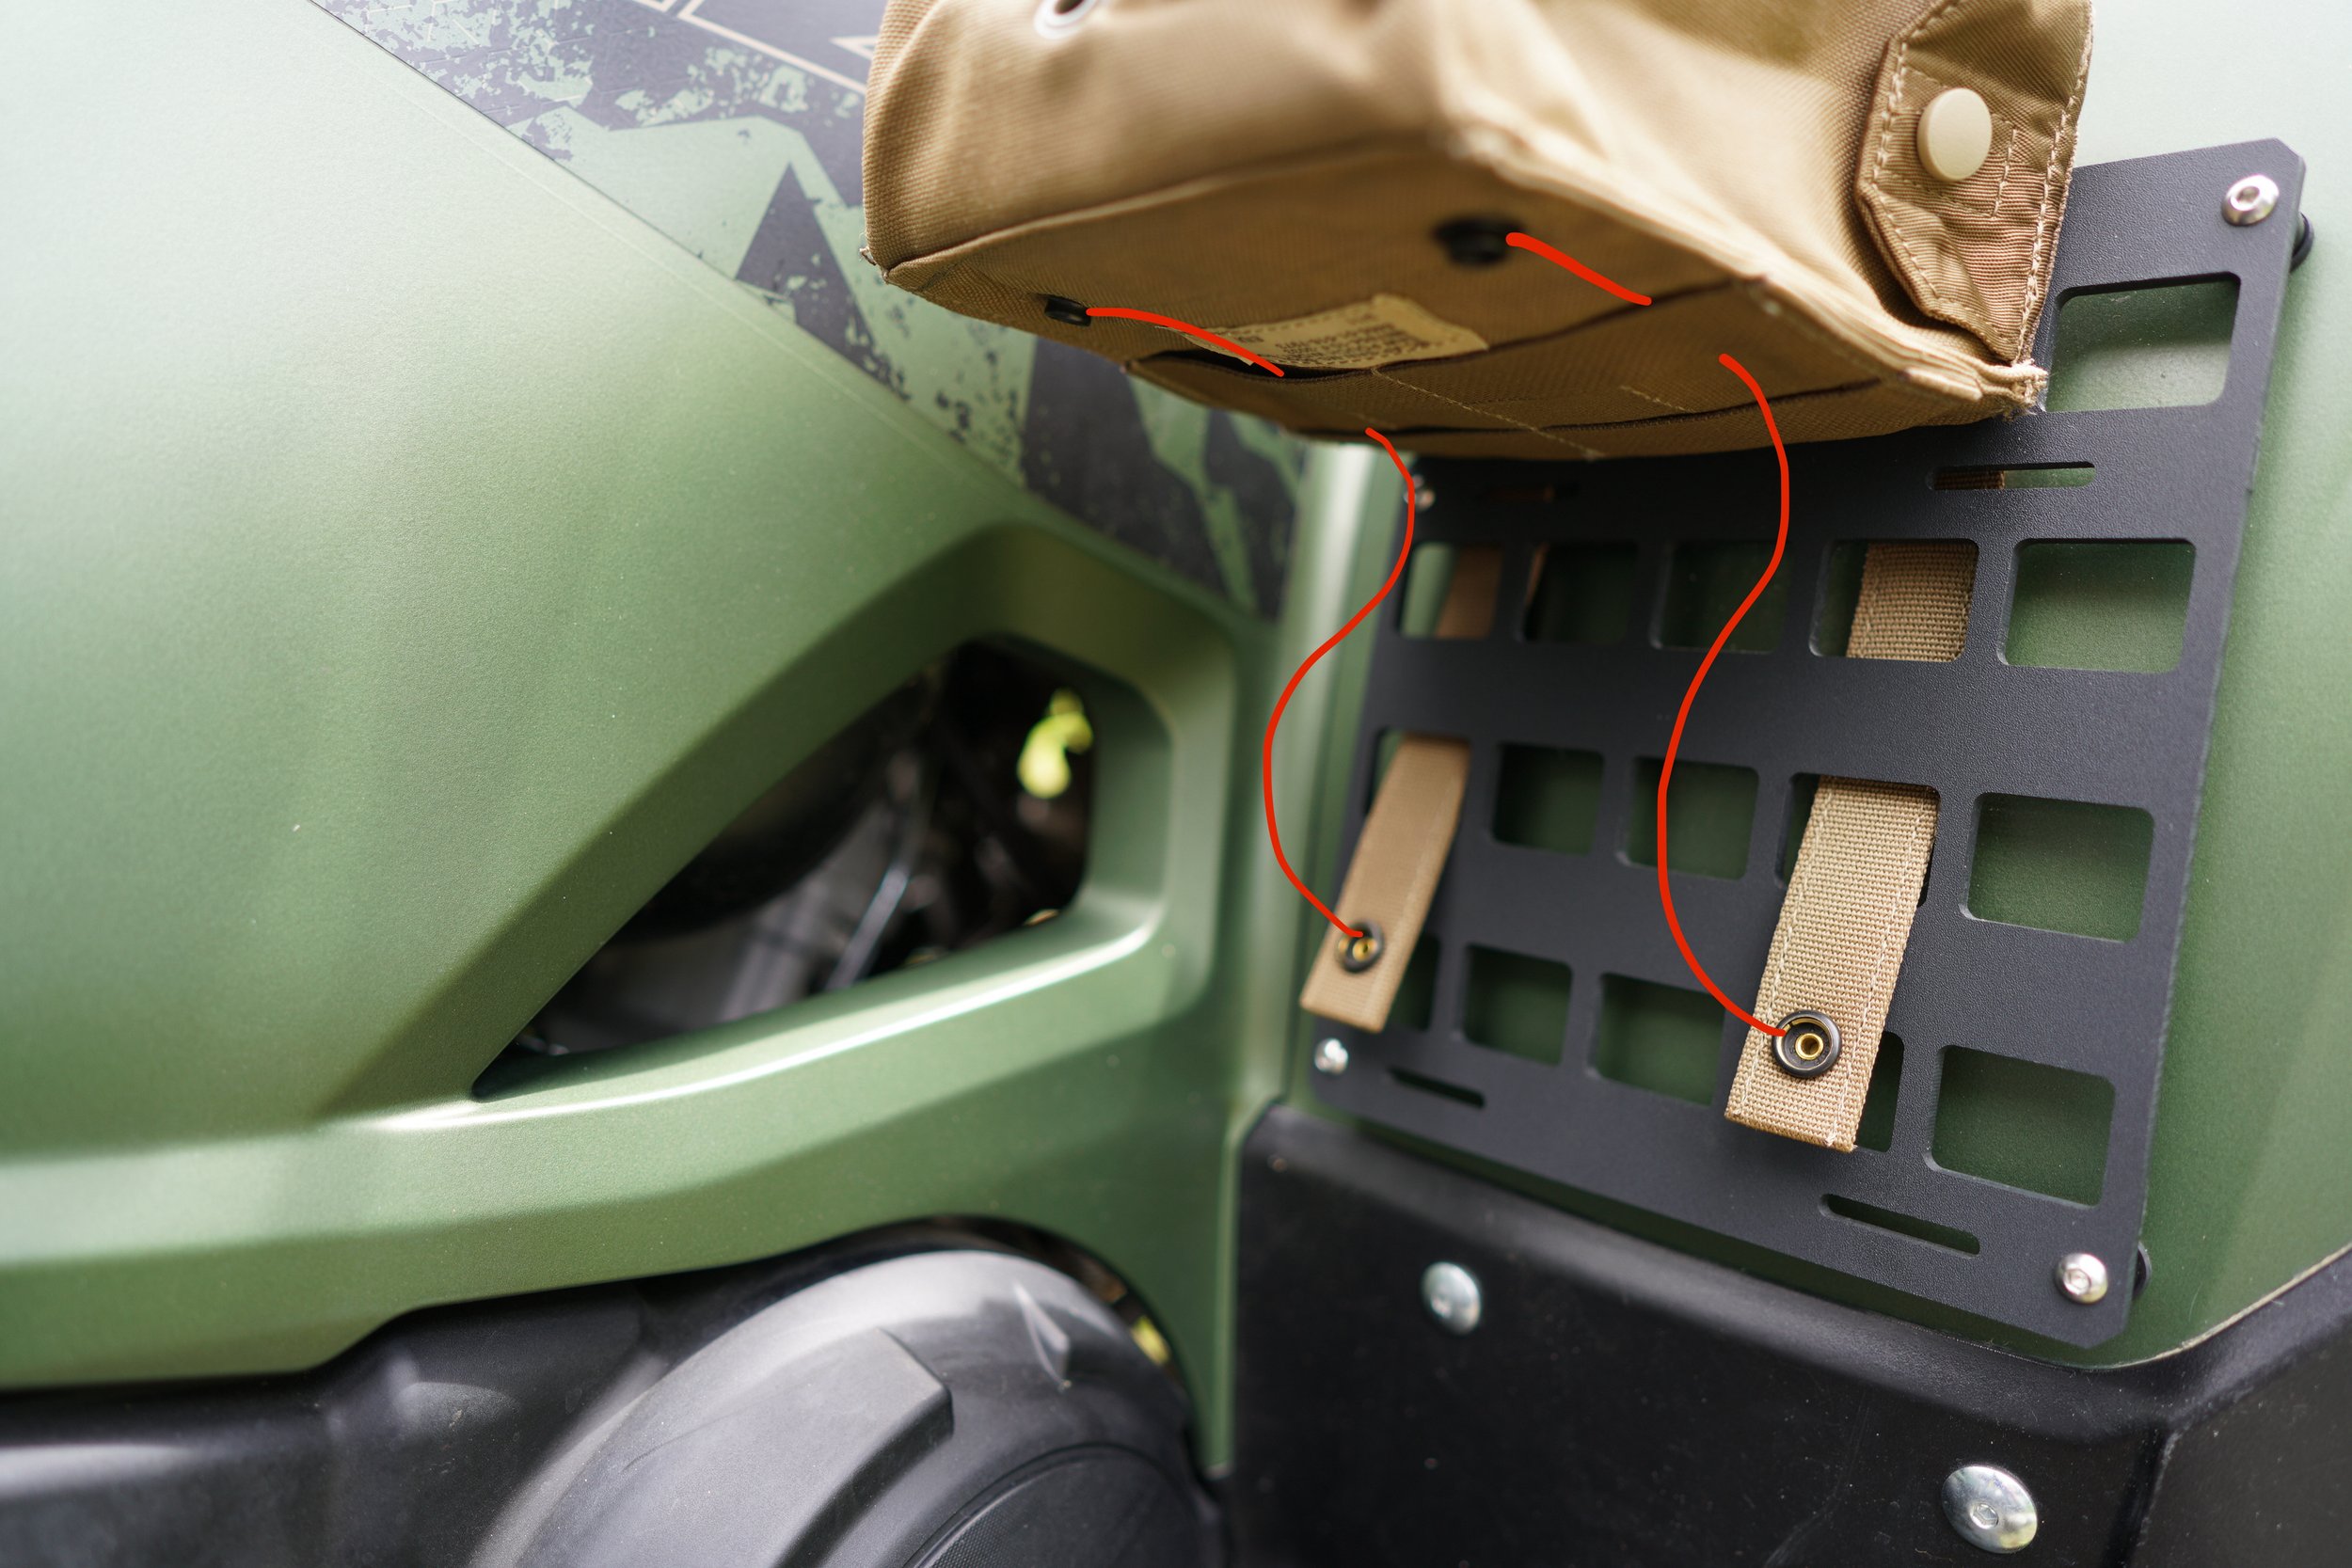
Ignore the red lines in the photo below for a moment and notice that, toward the top of the FenderLink, the straps pass behind the panel and are sent down several rows before being brought back through to the front side. You may end up varying your strategy somewhat depending on the overall height of your accessory, but the general rule is to skip rows as needed to get the most secure fit.
There is one more important mistake to avoid. You should ALWAYS end your weave by passing the strap through the last row on your MOLLE accessory just ahead of the snap located toward the bottom of the bag or pouch. This is shown by the red lines which indicate the proper pathway for the straps. This is critical since it prevents the snap from being pulled in a way that could cause it to open. It also secures the MOLLE accessory more tightly to the FenderLink, preventing unwanted movement during aggressive riding.
Attaching Quick Fist® Clamps
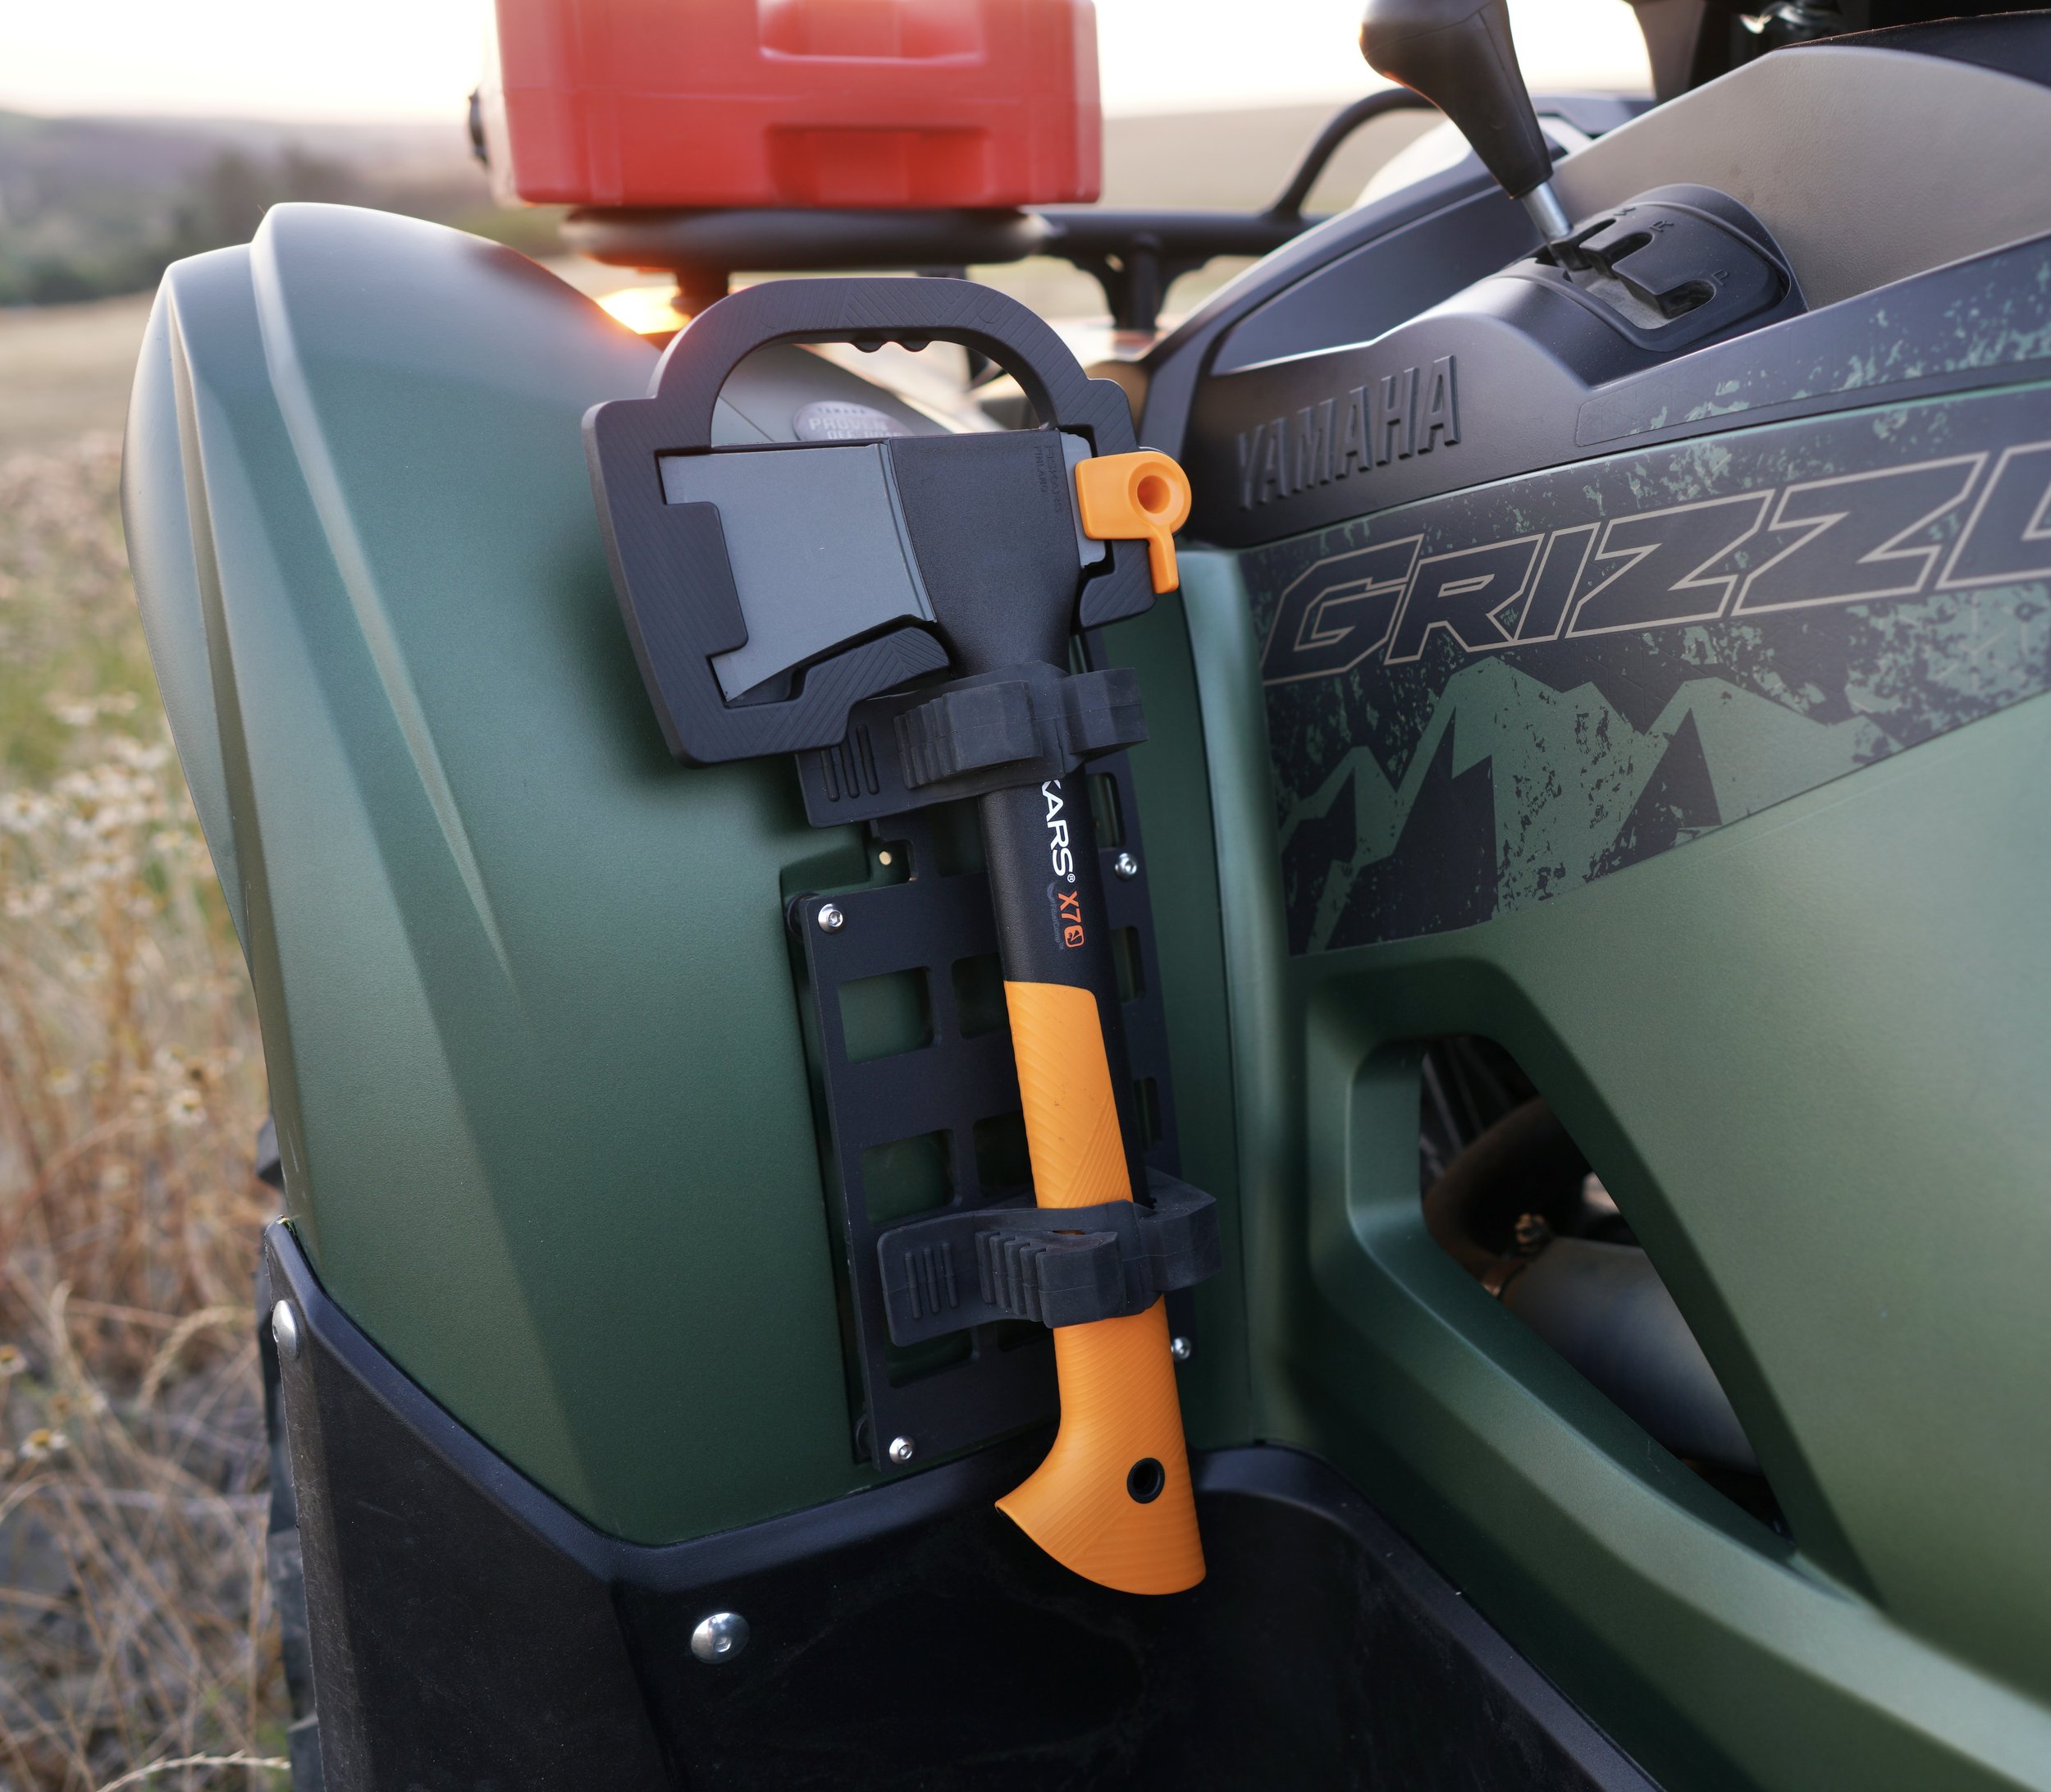
FenderLinks are also designed to accept optional USA-made Quick Fist clamps (available online) for securing items like small shovels, hatchets, and similar tools that have a handle in the 1”to 2” diameter range.
Installation Tips
FenderLinks have Quick Fist slots in multiple locations for bolting clamps in place. The use of slots (as opposed to small holes) allows for fine tuning the location of your clamps to best position your tool of choice. The slots are designed to accept #10 screws and nuts (M5 screws will also typically fit). However, once FenderLinks are installed onto a fender, attaching Quick Fist clamps can be a little tricky. Two methods can save some frustration during the installation:
The first method requires a little creativity. Since it’s difficult to place a nut and washer behind the FenderLink to accept the #10 screw used to bolt the Quick Fist clamp in place, you can use a little tape to carefully secure the nut and washer to your wrench. Once you’ve done that, you can easily slip the wrench—loaded with a nut and washer—behind the FenderLink. Take your time and you will be able to pass the screw through the slot in the FenderLink (obviously with your Quick Fist clamp in place) and thread it into the nut. Tighten things up and you’re all set.
You can also vary this method slightly by ditching the nut/washer/tape approach, and instead using a stainless steel flange locknut. This is basically a nut with the washer built in. Use one of these along with a box wrench (think closed circle rather the open “U” shape), and it makes the job even simpler. The flange shape makes it possible to retain the nut in the wrench while you slip it behind the fender link. You don’t need the tape for this approach, but if you want to be 100 percent sure you don’t drop the flange bolt, you can go ahead and further secure it to the box wrench with a small piece.The second method requires a little more ingenuity and some additional tooling. If you have a grinder handy and feel comfortable with some minor modifications to hardware, you can purchase #10 carriage bolts (not just any bolt, it MUST be a carriage bolt) and grind them to allow their heads to pass through the slots in the FenderLinks. You will need to grind down two (opposite) sides of the carriage bolt heads until they are flat and even with the width of the screw shaft. The modified carriage bolt will now be shaped like a “T.” Simply take the modified bolt, pass it—head first—through the slot in the FenderLink, and rotate it 90 degrees so it grabs the FenderLink from the backside. The carriage bolt will now be ready to accept the Quick Fist clamp followed by the nut. This method prevents the need to access the backside of the FenderLink altogether and is the best approach if you want to easily change things up in the future.
Attaching other gear
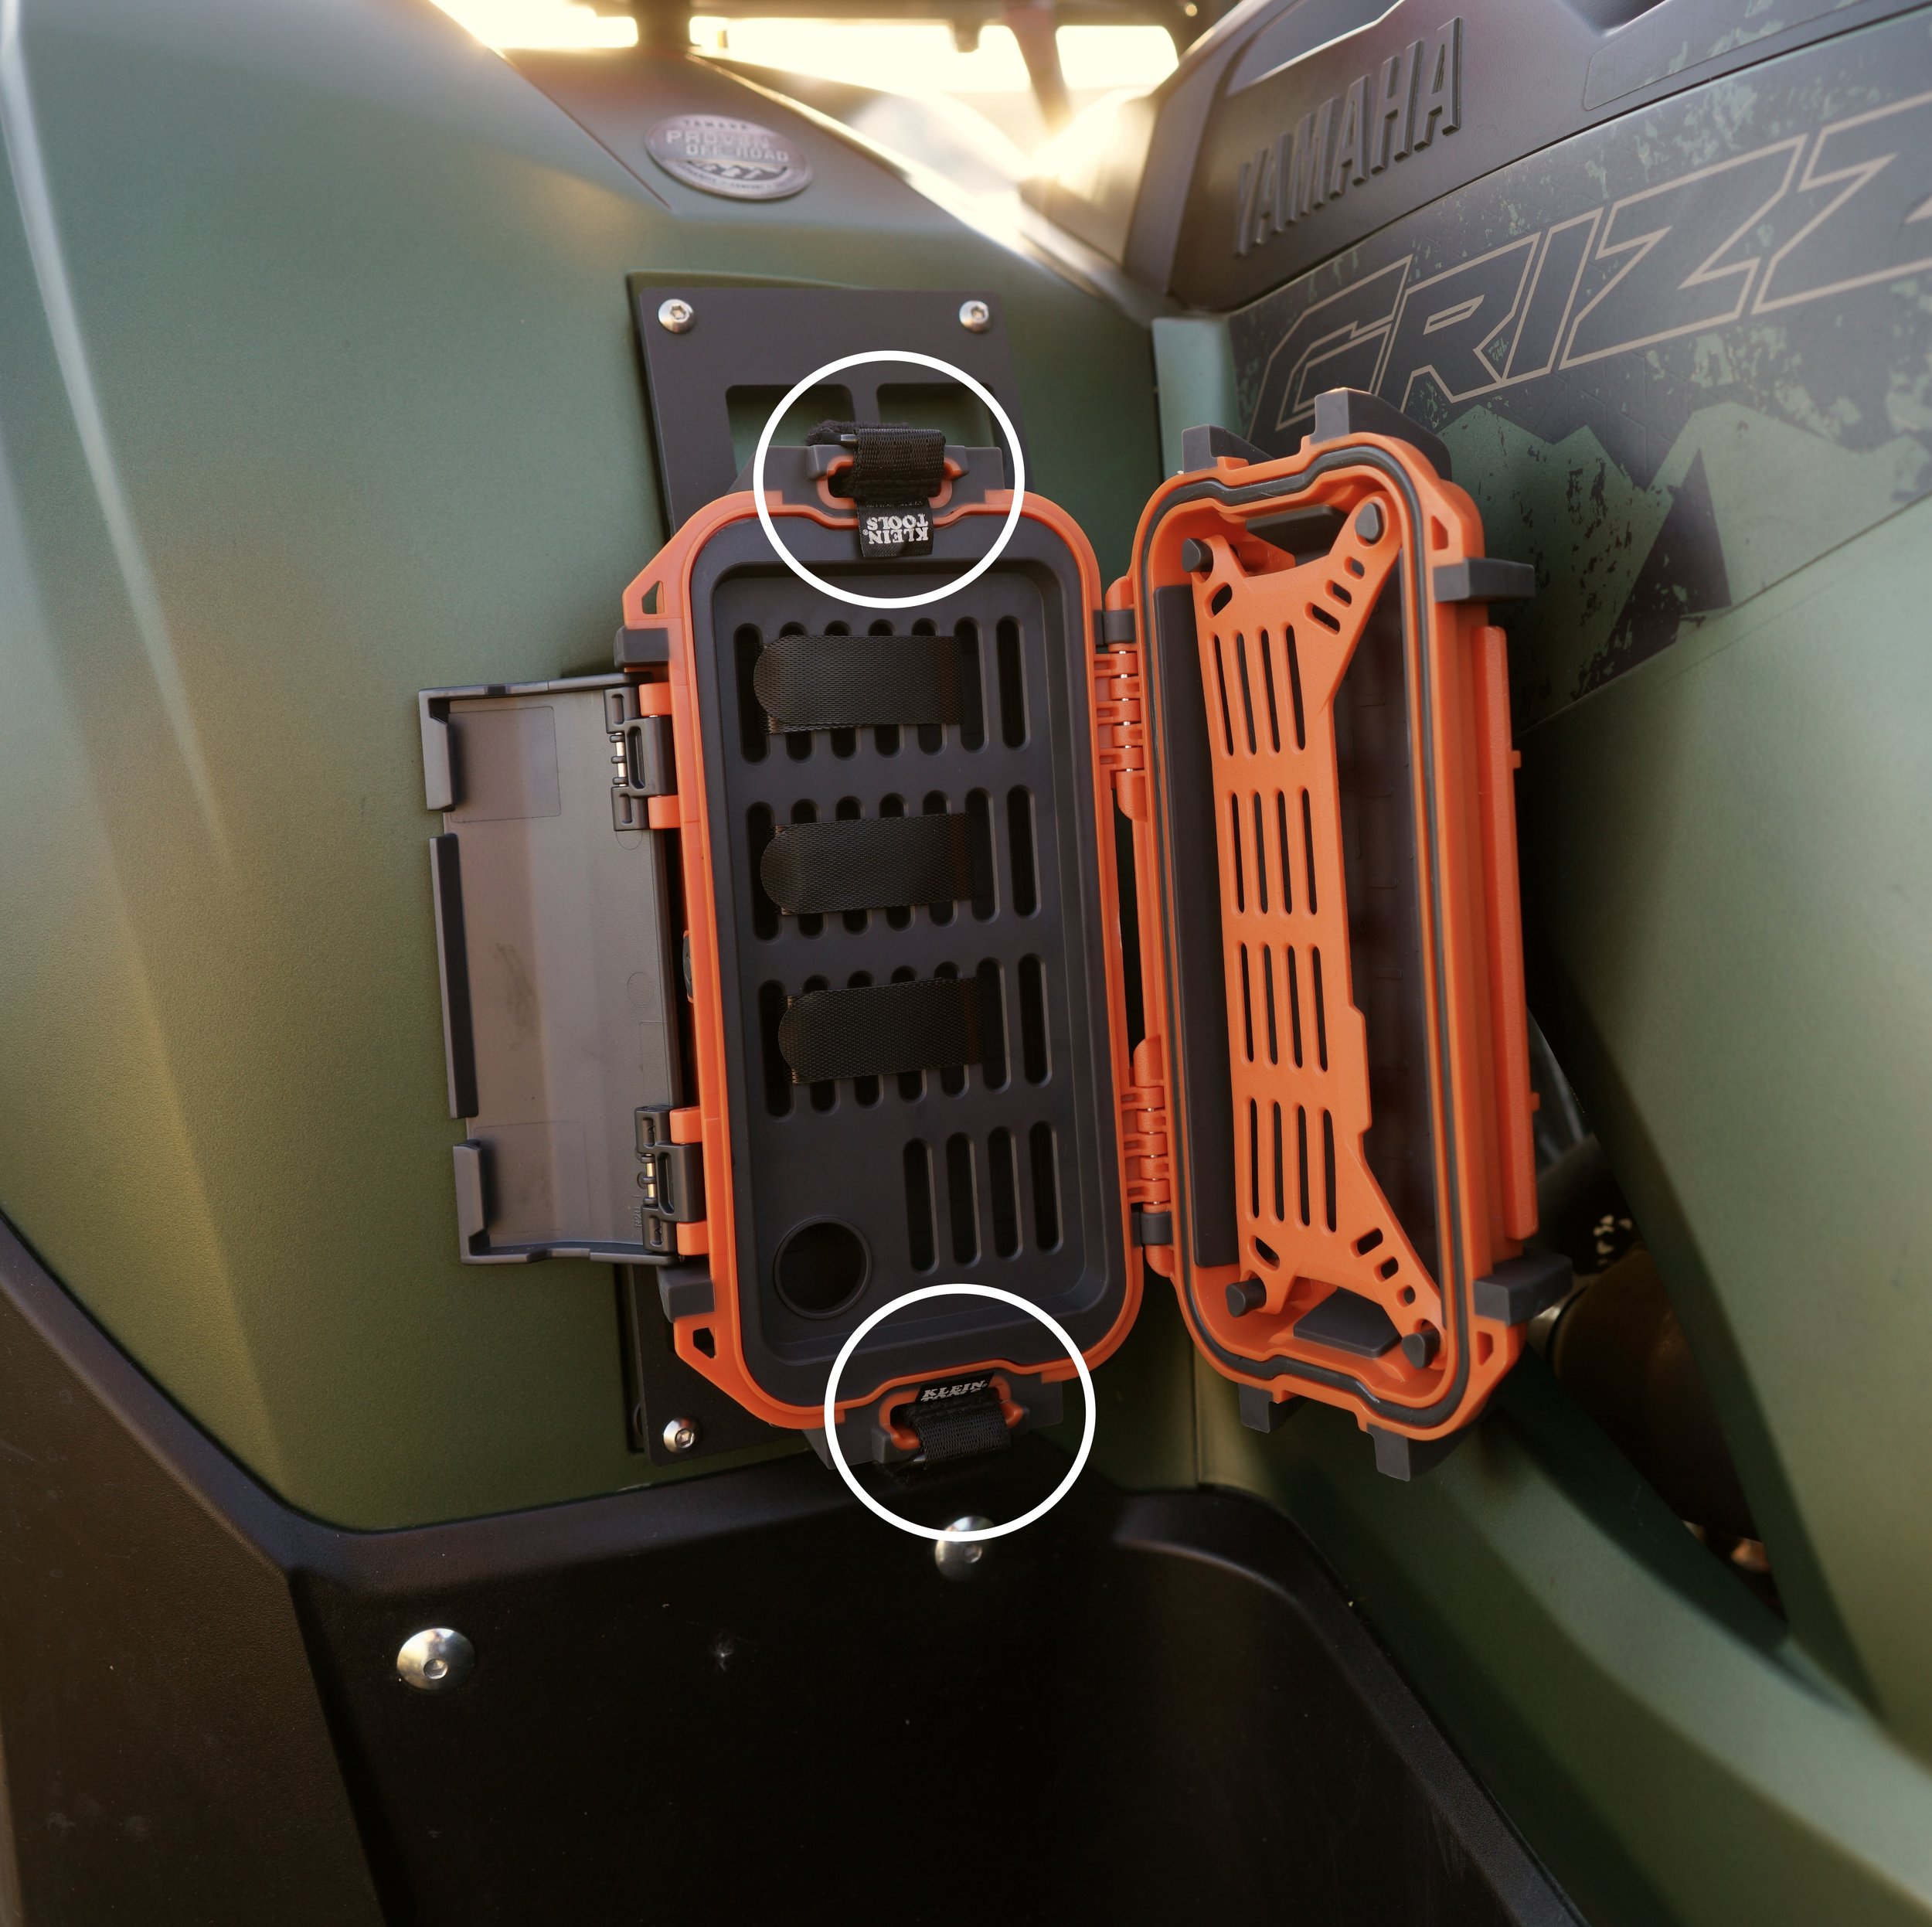
FenderLinks are also excellent for securing gear with different attachment methods, such as cinch straps, bungee cords, and Velcro straps. The waterproof Pelican case in the photo below is attached with small velcro cinch straps and holds very securely:


